 Skype for Business Call Queues were announced 3/27/2017 by Microsoft as available for use. Call Queues is a way to setup a callcenter or organize phone support for your customers.
What is Call Queue and what it’s able to do?
- Often paired with Auto Attendants (also just released), Call Queues can have custom corporate greetings and hold music for inbound calls.
- They can accept up to 200 calls per instance and queues up calls to be serviced.
- Have the ability to automatically distribute the waiting calls in First In, First Out (FIFO) manner to the available agents.
- Currently, the solution allows organizations to designate up to 50 Agents in the Call Queue. Maximum Queue size and maximum allowed call wait time are configurable and can setup overflow or timed-out calls to go to another Call Queue, Auto Attendant, Voicemail or Users.
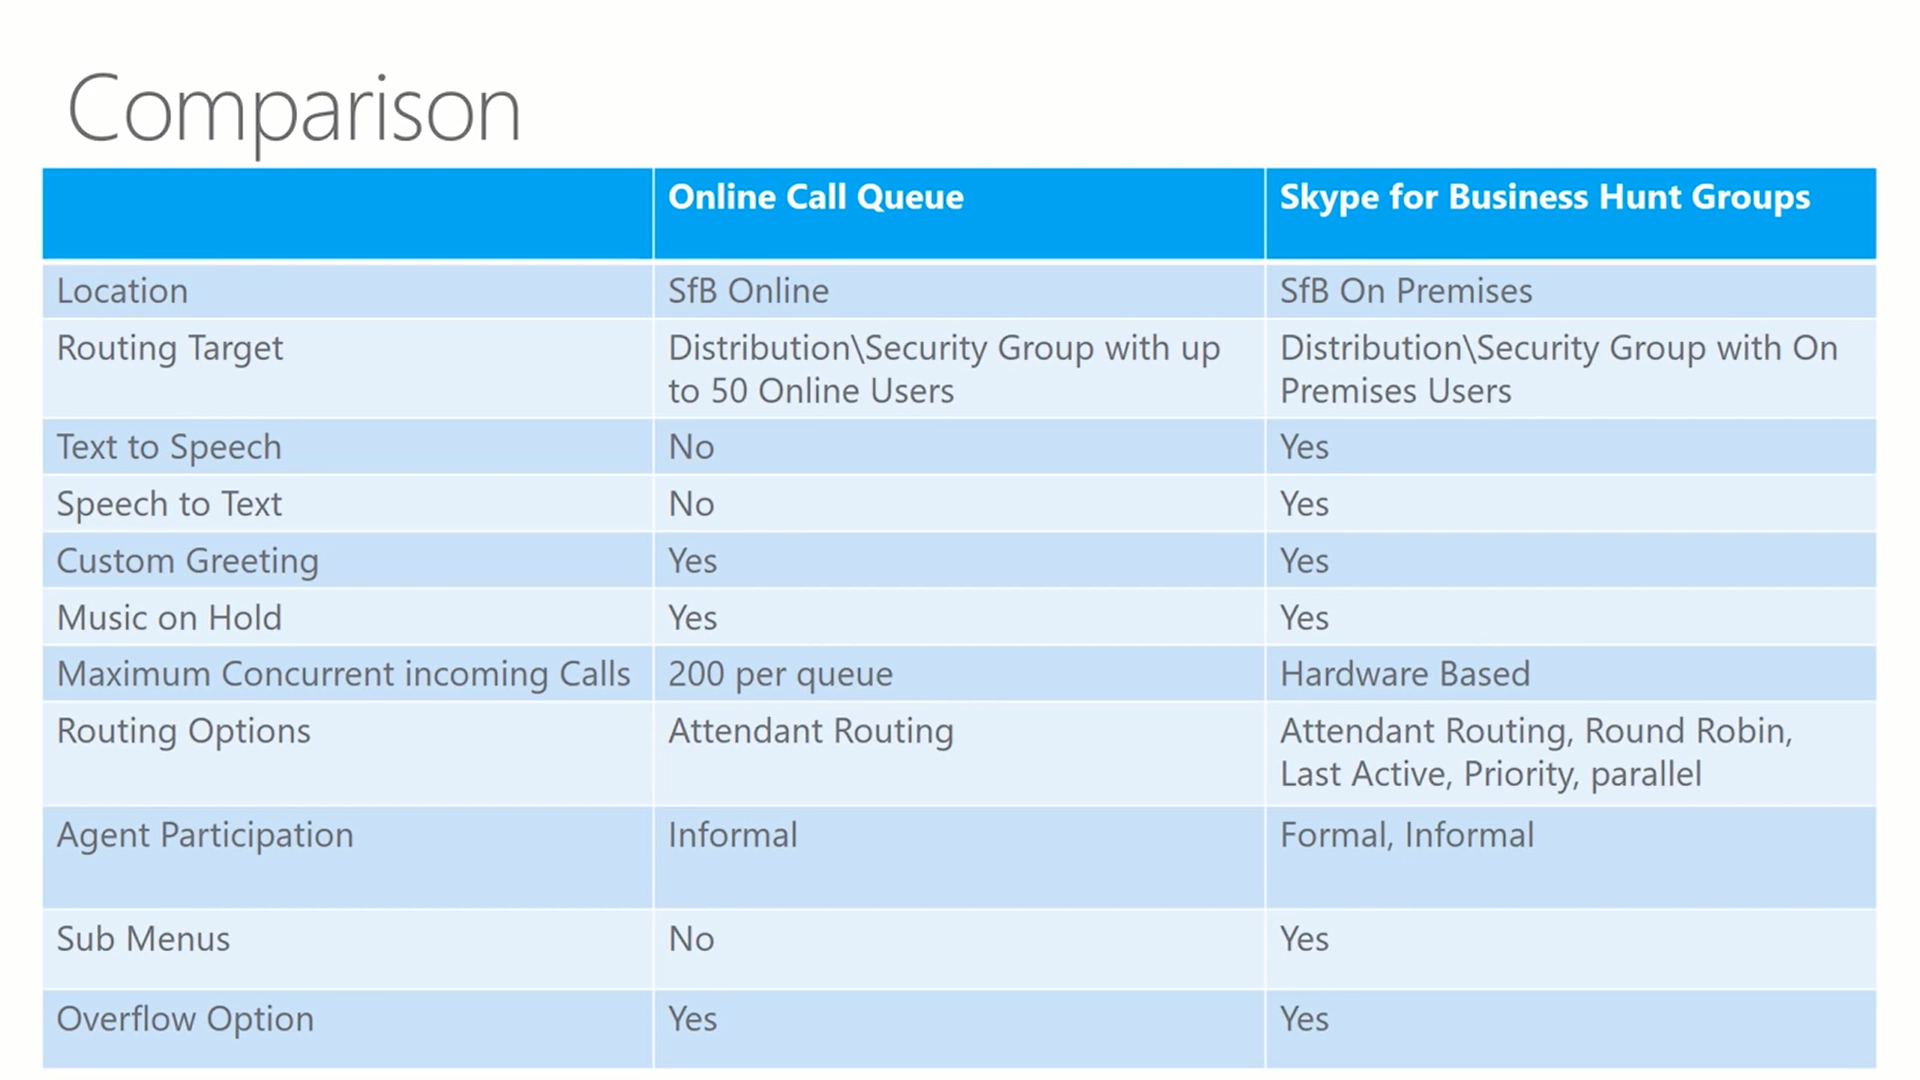
Differences between Skype for Business Ring Groups and Call Queues
 Now let’s get into the caller’s experience. Each Call Queue will need to have a customized greeting built, as it doesn’t come with a default message. An example would be “Thank you for calling Microsoft, we are connecting you to the next available agent.” The caller is then connected to an agent based on agent availability. When the Maximum Concurrent Calls or Timeout is reached, you can figure the following options:
- Connect to different Queue (overflow)
- Connect to Auto Attendant (overflow)
- Calls can be disconnected
- Forwarded to a separate agent
- Directly to an agent’s voicemail
For the callee (recipient) of the call, the Agent will receive certain information immediately. They will receive call queue name and caller’s ID, and then can choose to pick up or not. If the call is picked up, the Agent is connected with the caller after the connection is complete (1-3 seconds). If the call is ignored, no missed call notification is generated and next incoming call will be displayed.
With the custom greeting for the inbound callers in a Call Queue, a custom recording must be created and uploaded, as the Call Queues don’t currently support text-to-speech. For Hold Music, please make sure you choose music that is rights-free or royalties are paid for copyright considerations. Service numbers must be available for each Call Queue, which can use be Toll and Toll-Free, but Toll-Free requires PSTN Consumption Billings.
Attendant Routing Method – This rings all the Agents in the Call Queue in parallel. This is the same functionality as Response Group Service on Skype for Business 2015 on premise. Agents already in a call will get a new call from the Call Queue, which they can choose to accept or not. Only Agents that have their status as Offline or on Do-not-Disturb will not get a call. Agents can also have multiple calls on hold.
Prerequisites for Call Queues
Agent Groups
Agent Groups must be a distribution list or a mail-enabled Security Group, which can be fully online or synced from on-premises. Nested Distribution Lists are supported, but Office 365 Groups are not supported. These groups need to by synchronized from Azure Active Directory to Azure Address Book Services, which has a delay for new Distribution Lists and Security Groups of up to 4-6 hours. Distribution Lists need to be in AABS before Call Queue can use them. Distribution List membership is updated each 30 minutes.
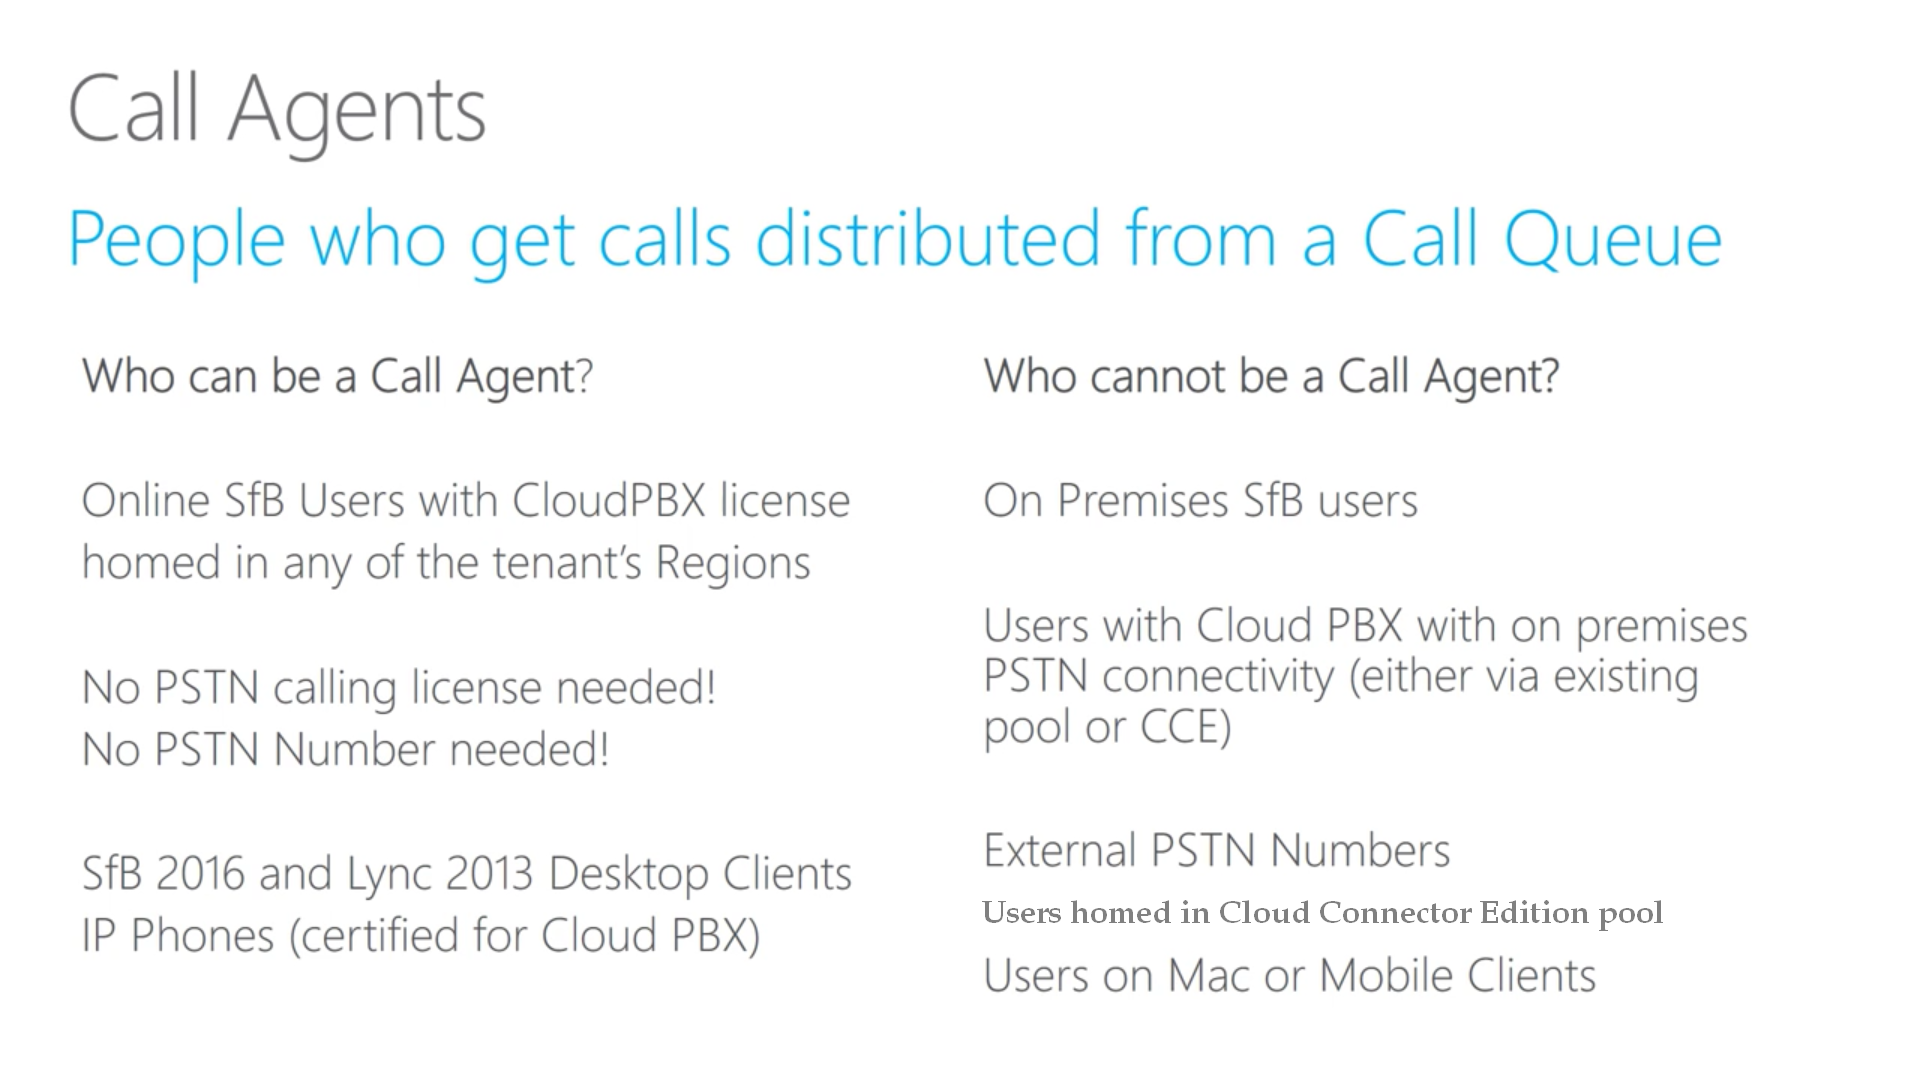
Call Agents
For organizations using Hybrid deployments, depending on where the user lives and how they are licensed will dictate their ability to leverage Call Queues. Below breaks down who can and cannot be in Call Queues for Skype for Business Online.
Call Queue Greetings
Greetings are optional, and if you would like to use them, a pre-recorded greeting can be uploaded. For a greeting or hold music, a maximum file size of 5 megabytes is allowed.
Deploying Skype for Business Call Queues
First off, satisfying the prerequisites is mandatory for deploying a Call Queue, are outlined below:
- Create Agent Group: Create a security group or distribution group and add the agents
- Create Service Numbers
- Create Greeting
- Determine Limits: Max concurrent calls and waiting time
- Overflow Option: Route to call queue, Auto Attendant, agent or disconnect call
Now that the prerequisites are met, it’s time to configure the queue. Open up the Skype for Business Online Admin Panel, Open “Call Routing”, Select “Call Queues” tab, Use “+Add new” to add a new Call Queue. From here, you can select the following information in the GUI interface:
- Name (Display name for the queue)
- Phone Number (Use the drop down menu to select an existing service number)
- Domain (Select your SIP domain)
- Greeting (Upload your own optional greeting)
- Music on Hold (Use the default, non, or custom Music On Hold)
- Maximum Calls (Select the maximum concurrent calls)
- Max Call Limit Action (Select call queue, Auto Attendant, disconnect, or route back to fall back user)
- Wait time (Specify the total waiting time in the queue before timeout)
- Time out action (Select Call Queue, Auto Attendant, Disconnect or route to fall back user)
- Click to Save when done
If you prefer to use Powershell Commands, you can follow these steps:
- New-CSHuntGroup (Used to create the new Call Queues)
- Get-CSHuntGroup (Used to retrieve Call Queues)
- Set-CSHuntGroup (Used to create configuration changes in Call Queues)
- Remove-CSHuntGroup (Used to remove Call Queues)
Operating Call Queues
In the Skype for Business Admin Panel, open Call Routing. You can use the test button from the panel to test the queue and ensure it’s routing as designed.
Call Queue Migration
First, you will need to investigate all of the functions that you rely on for your current solution to determine if today’s functionality will meet your needs. Should you require functionality that exceeds what’s available today, you can either wait until functionality becomes available, or if the functionality is not in the roadmap for Skype for Business Online, a 3rd party Contact Center solution may be necessary.
If the functionality does meet your needs, you will need to port your existing Call Queue numbers to Skype for Business online, and temporary numbers can be acquired to stage the Call Queues.