Since Windows Server 2016 you will not find “Windows Update” section in Control Panel. Instead you can manage or enable/disable updates in two ways: using sconfig or through Group policy.
Manage Windows Server 2016 updates with sconfig
 To determine what updates your machine has already installed, follow these steps:
- Open a command prompt with Admin permissions.
-
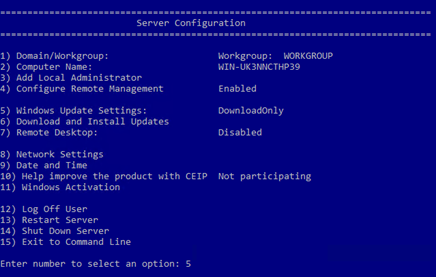
Type sconfig and press Enter.
-
Option #5 shows the current configuration of your Windows Update settings.
To change your Windows Update Settings with SCONFIG, follow these steps:
- Open a command prompt with Admin permissions.
-
Type sconfig and press Enter.
-
Press 5 and then Enter. This will bring up the following options for you to choose from:
-
- (A)utomatic – This will configure your machine to automatically scan, download, install and reboot after applying any updates.
- (D)ownloadOnly – This will automatically scan, download and notify the admin if updates need to be installed. This is the default setting on Windows Server 2016.
-
(M)anual — This turns Automatic Updates off. Your system will never check for updates.
- Press the letter specified in the “( )” and press Enter to apply.
-
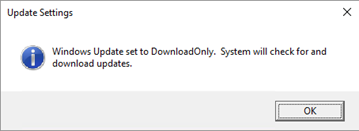
When the tool applies the configuration you have selected, you will see a message pop-up similar to the one below. Click the OK button to dismiss the message. The tool will refresh the menu and option 5 will now show the new configuration.
Manage Windows Server 2016 updates with Group Policy
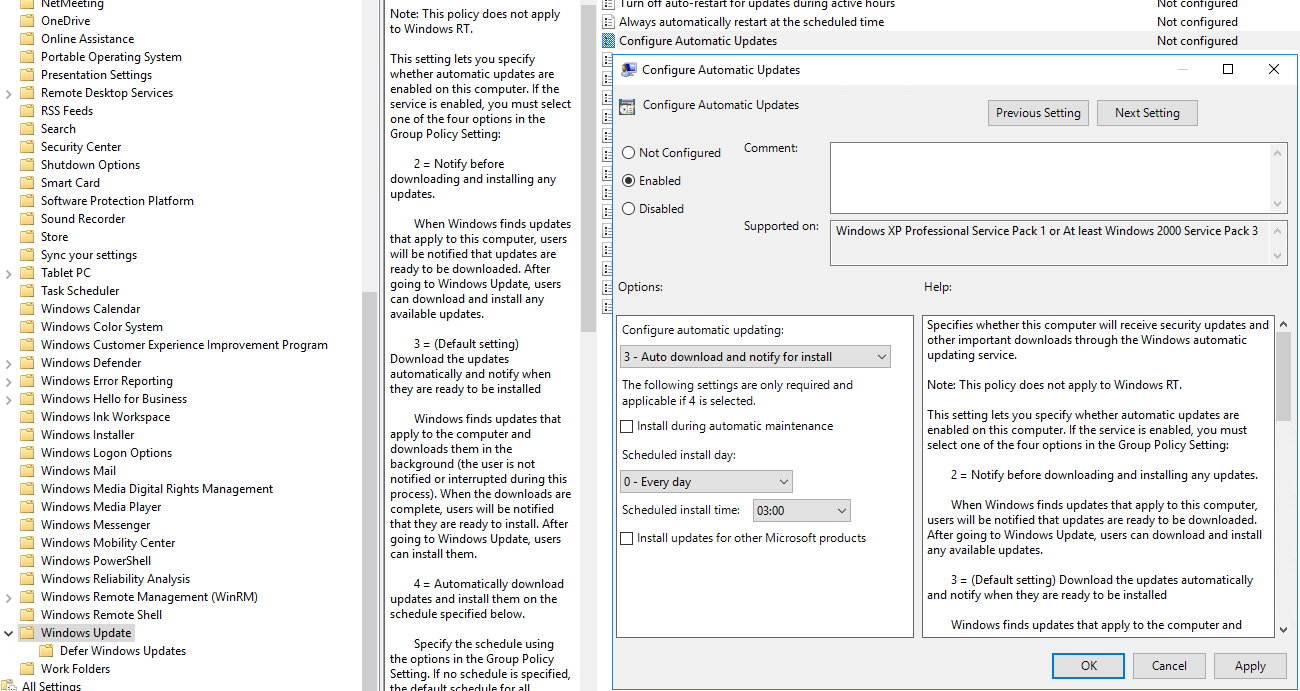
In the Control Panel -> Administrative Tools -> Edit Group Policy open Computer Configuration -> Administrative Templates -> Windows Components -> Windows Update and doubleclick on Configure Automatic Updates setting and choose appropriate option. Then click OK.
You are all set!


