 Suppose you need to migrate or duplicate Vicidial data (campaigns, leads, phones and so on) from one Vicibox server to another. In case two Vicidial boxes of the same versions the process will be simpler. In case the source server has older Vicibox version than the destination one you will have to perform additional steps to get the destination server working. Both cases are covered in the article below.
Backup/restore Vicidial data between the same version of Vicibox
Basically, to get the Vicidial backup you will need to run /usr/share/astguiclient/ADMIN_backup.pl script that has the following options:
|
1 2 3 4 5 6 7 8 9 10 11 12 13 14 15 16 17 18 19 20 21 22 23 24 25 26 27 |
/usr/share/astguiclient/ADMIN_backup.pl --help allowed run time options: [--db-only] = only backup the database [--db-settings-only] = only backup the database without leads, logs, servers or phones [--db-without-logs] = do not backup the log tables in the database [--db-without-archives] = do not backup the archive tables in the database [--dbs-selected=X] = backup only selected databases, default uses conf file db only to backup databases X and Y, use X---Y, can use --ALL-- for all dbs on server you can use --ALLNS-- for all non-mysql dbs(will ignore 'test', 'mysql','information_schema') This feature will NOT work with '--db_raw_files_copy' option [--conf-only] = only backup the asterisk conf files [--without-db] = do not backup the database [--without-conf] = do not backup the conf files [--without-web] = do not backup web files [--without-sounds] = do not backup asterisk sounds [--without-voicemail] = do not backup asterisk voicemail [--without-crontab] = do not backup crontab [--ftp-transfer] = Transfer backup to the 'REPORTS' FTP server [--ftp-server=XXXXXXXX] = OVERRIDE FTP server to send file to [--ftp-login=XXXXXXXX] = OVERRIDE FTP user [--ftp-pass=XXXXXXXX] = OVERRIDE FTP pass [--ftp-dir=XXXXXXXX] = OVERRIDE remote FTP server directory to post files to [--debugX] = super debug [--debug] = debug [--test] = test [--db_raw_files_copy] = if set the backup won't be a mysql dump. It will tar the /var/lib/mysql folder. WARNING, THIS OPTION WILL STOP THE MYSQL SERVER! [--archive_path=/PATH/FROM/ROOT] = absolute path to store the resulting backup |
As you see it is capable to create partial backup, but in my example I run it like this to get a full backup of Vicidial:
|
1 2 3 4 5 6 7 8 9 10 11 12 13 14 15 |
# /usr/share/astguiclient/ADMIN_backup.pl --archive_path=/root ----- Archive path set to /root ----- ----- Mysql dump ----- /bin/tar: Removing leading `/' from member names /bin/tar: Removing leading `/' from member names /bin/tar: Removing leading `/' from member names /bin/tar: Removing leading `/' from member names /bin/tar: Removing leading `/' from member names /bin/tar: Removing leading `/' from member names /bin/tar: Removing leading `/' from member names script execution time in seconds: 48 minutes: 0.8 |
If the server has address 192.168.10.3 this will create 192.168.10.3_ALL_1.tar.gz archive that contains a set of archives with database dump and configuration files in their respective paths.
Now transfer it to the destination server (192.168.10.4) via SCP or any other suitable method. For example:
|
1 |
# scp /root/192.168.10.3_ALL_1.tar.gz root@192.168.10.4:/ |
Now on the destination server navigate to / folder and extract the Vicidial backup archive:
|
1 |
# tar -zxvf 192.168.10.3_ALL_1.tar.gz |
Inside the main archive there will be separate archives for different parts of Vicidial system:
|
1 2 3 4 5 6 7 8 9 10 |
# ls -l / [...] 192.168.10.3_BIN_1.tar 192.168.10.3_CONF_1.tar 192.168.10.3_LINUX_1.tar 192.168.10.3_SOUNDS_1.tar 192.168.10.3_VOICEMAIL_1.tar 192.168.10.3_WEB_1.tar 192.168.10.3asterisk1.gz [...] |
In tar archives config files are packed in their respective paths so in order restore Vicidial configuration files just unpack the .tar archives:
|
1 |
# tar -xvf *.tar |
Now extract and restore Vicidial database dump:
|
1 2 3 |
# tar -zxvf 192.168.10.3asterisk1.gz 192.168.10.3asterisk1 # mysql -u root asterisk < 192.168.10.3asterisk1 |
At this point you have configuration files and database from the old server applied on the new one. We must change IP addresses in all configuration files and in database before we can use the new server.
To change IP address in all Vicidial configuration files and database run:
|
1 2 3 4 5 6 7 8 9 10 11 12 13 14 15 16 17 18 19 20 21 |
# /usr/share/astguiclient/ADMIN_update_server_ip.pl Previous astGUIclient configuration file found at: /etc/astguiclient.conf Would you like to use interactive mode (y/n): [y] STARTING SERVER IP ADDRESS CHANGE FOR VICIDIAL... Old server IP address or press enter for default: [192.168.10.4] 192.168.10.3 server IP address or press enter for default: [192.168.10.4] old server_ip: 192.168.10.3 new server_ip: 192.168.10.4 Are these settings correct?(y/n): [y] Writing change to astguiclient.conf file: /etc/astguiclient.conf STARTING DATABASE TABLES UPDATES PHASE... Updating servers table... |0E0|UPDATE servers SET server_ip='192.168.10.4' where server_ip='192.168.10.3';| [...] |
This script is interactive and will guide you through the process.
Make sure there are no errors in the script’s output.
Now reboot your server and check functionality!
Backup/restore Vicidial data from Vicibox 8 to Vicibox 9
In this case the process will include additional steps.
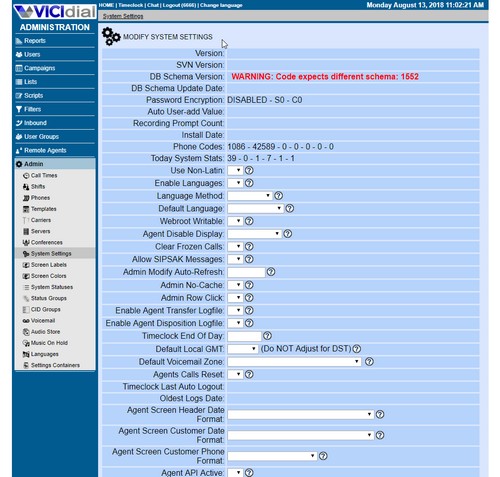
1. Upgrade database schema. Vicibox 9 has new and altered tables and functions so you will have to add them to the restored database before you can use system
2. Run /usr/share/astguiclient/ADMIN_update_server_ip.pl again
3. Try to log in as agent. If you have the error There is a time synchronization problem with your system, please tell your system administrator – fix it as described here.
4. If you have the error Delays on agent login No one is on your session 8600051 check that in Admin -> Servers you have correct Asterisk Version set:
For Vicibox 8 it will be 11.21.2.-vici but for Vicibox 9 it should be at least 13.29.2-vici
Correct version of the Asterisk you can obtain by:
|
1 |
# asterisk -rx "core show version" |
Set the correct version in Vicidial’s settings make sure the error is gone.
That’s it!
Now you should have fully functional Vicidial!
Good luck!


