 Cobertura Code Coverage in Azure DevOps
Publishing code coverage in Azure DevOps and making it look pretty is way harder than it should be. It’s something that sounds simple, oh just check the box on the task – but nope you have to make sure to read the notes and add the additional parameter to the test task. Okay great, now you have a code coverage tab, but what is this .coverage file and how do I open it? That’s not very user friendly. And don’t get me started on having to wait for the entire pipeline to finish before you can even see the code coverage tab – nonsensical.
Default method – out of the box
If using the out of the box dotnet task with the test command, simply add the publishTestResults argument (or if using the task assistant, check the Publish test results and code coverage checkbox):
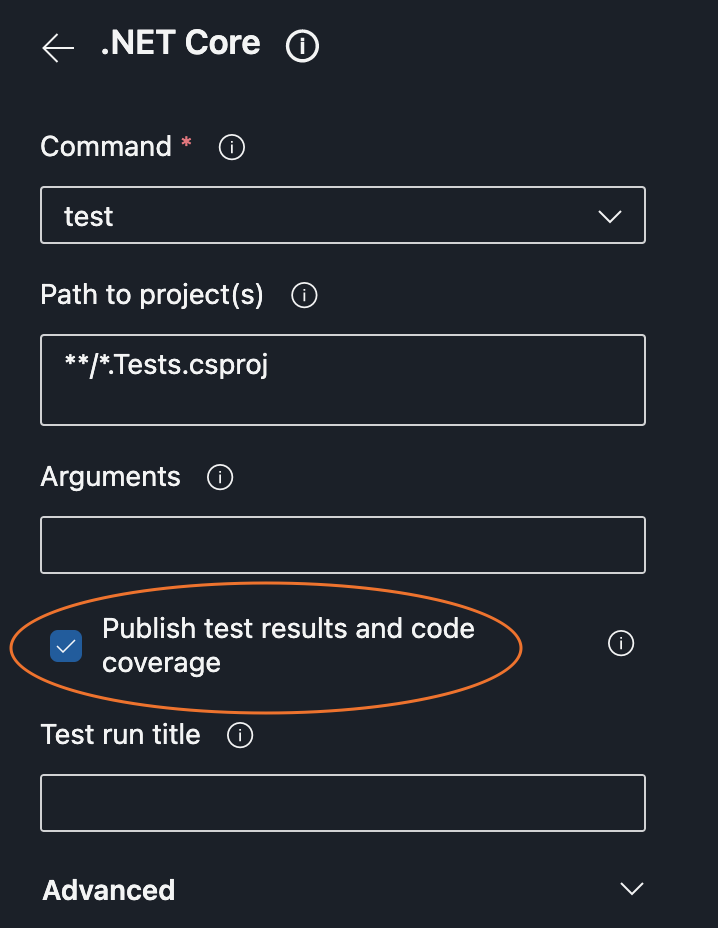
.NET Core Task Assistant UI
However, if you read the information on the publishTestResults argument from the .NET Core CLI task (or clicking on the (i) on the Publish test results and code coverage option in the task assistant), it says:
Enabling this option will generate a test results TRX file in
$(Agent.TempDirectory)and results will be published to the server. This option appends--logger trx --results-directory $(Agent.TempDirectory)to the command line arguments.Code coverage can be collected by adding
--collect "Code coverage"option to the command line arguments. This is currently only available on the Windows platform.
So even if you check the box, you need to ensure you add the --collect "Code coverage" argument. Oh, and you have to run this on a Windows agent, so no ubuntu-latest for us.
This produces code coverage that looks like the following in Azure DevOps: 
How the default code coverage in Azure DevOps looks
It’s a link to a .coverage file which is great if you 1) have Visual Studio installed and 2) are on Windows (can’t open .coverage file on Mac).
The Better Way
The better way is to add the coverlet.collector NuGet package to (each of) the test project(s) that you run dotnet test against.
The easiest way to do this is to run the dotnet package add command targeting the test project:
dotnet add <TestProject.cspoj> package coverlet.collector
 Adding coverlet.collector with dotnet add package
For those who can’t run the dotnet command, add the following under the ItemGroup block in the .csproj file:
|
1 2 3 4 |
<PackageReference Include="coverlet.collector" Version="3.2.0"> <IncludeAssets>runtime; build; native; contentfiles; analyzers; buildtransitive</IncludeAssets> <PrivateAssets>all</PrivateAssets> </PackageReference> |
See the following page for the latest version.
Next, update the pipeline to ensure your dotnet test command looks like mine, and adding the PublishCodeCoverageResults@1 task.
|
1 2 3 4 5 6 7 8 9 10 11 12 13 14 15 |
# Add coverlet.collector nuget package to test project - 'dotnet add <TestProject.cspoj> package coverlet.collector' - task: DotNetCoreCLI@2 displayName: dotnet test inputs: command: 'test' projects: '**/*.Tests.csproj' arguments: '--configuration $(buildConfiguration) --collect:"XPlat Code Coverage"' publishTestResults: true # Publish code coverage report to the pipeline - task: PublishCodeCoverageResults@1 displayName: 'Publish code coverage' inputs: codeCoverageTool: Cobertura summaryFileLocation: $(Agent.TempDirectory)/*/coverage.cobertura.xml # using ** instead of * finds duplicate coverage files |
The --collect:"XPlat Code Coverage" argument is what tells dotnet test to use the coverlet.collector package to generate us a cobertura code coverage report. As you can guess by the XPlat in the argument, this runs cross platform on both Windows and Ubuntu.
This argument creates a $(Agent.TempDirectory)/*/coverage.cobertura.xml code coverage report file. This folder is default output folder since Azure DevOps adds --results-directory /home/vsts/work/_temp to the command.
Next, we have to specifically add the PublishCodeCoverageResults@1 task to publish the code coverage output to the pipeline. It seems like at least with my project, it produces 2 coverage.cobertura.xml files and that throws a warning in the pipeline, so that’s I used $(Agent.TempDirectory)/*/coverage.cobertura.xml not $(Agent.TempDirectory)/**/coverage.cobertura.xml
 Duplicate coverage.cobertura.xml code coverage results
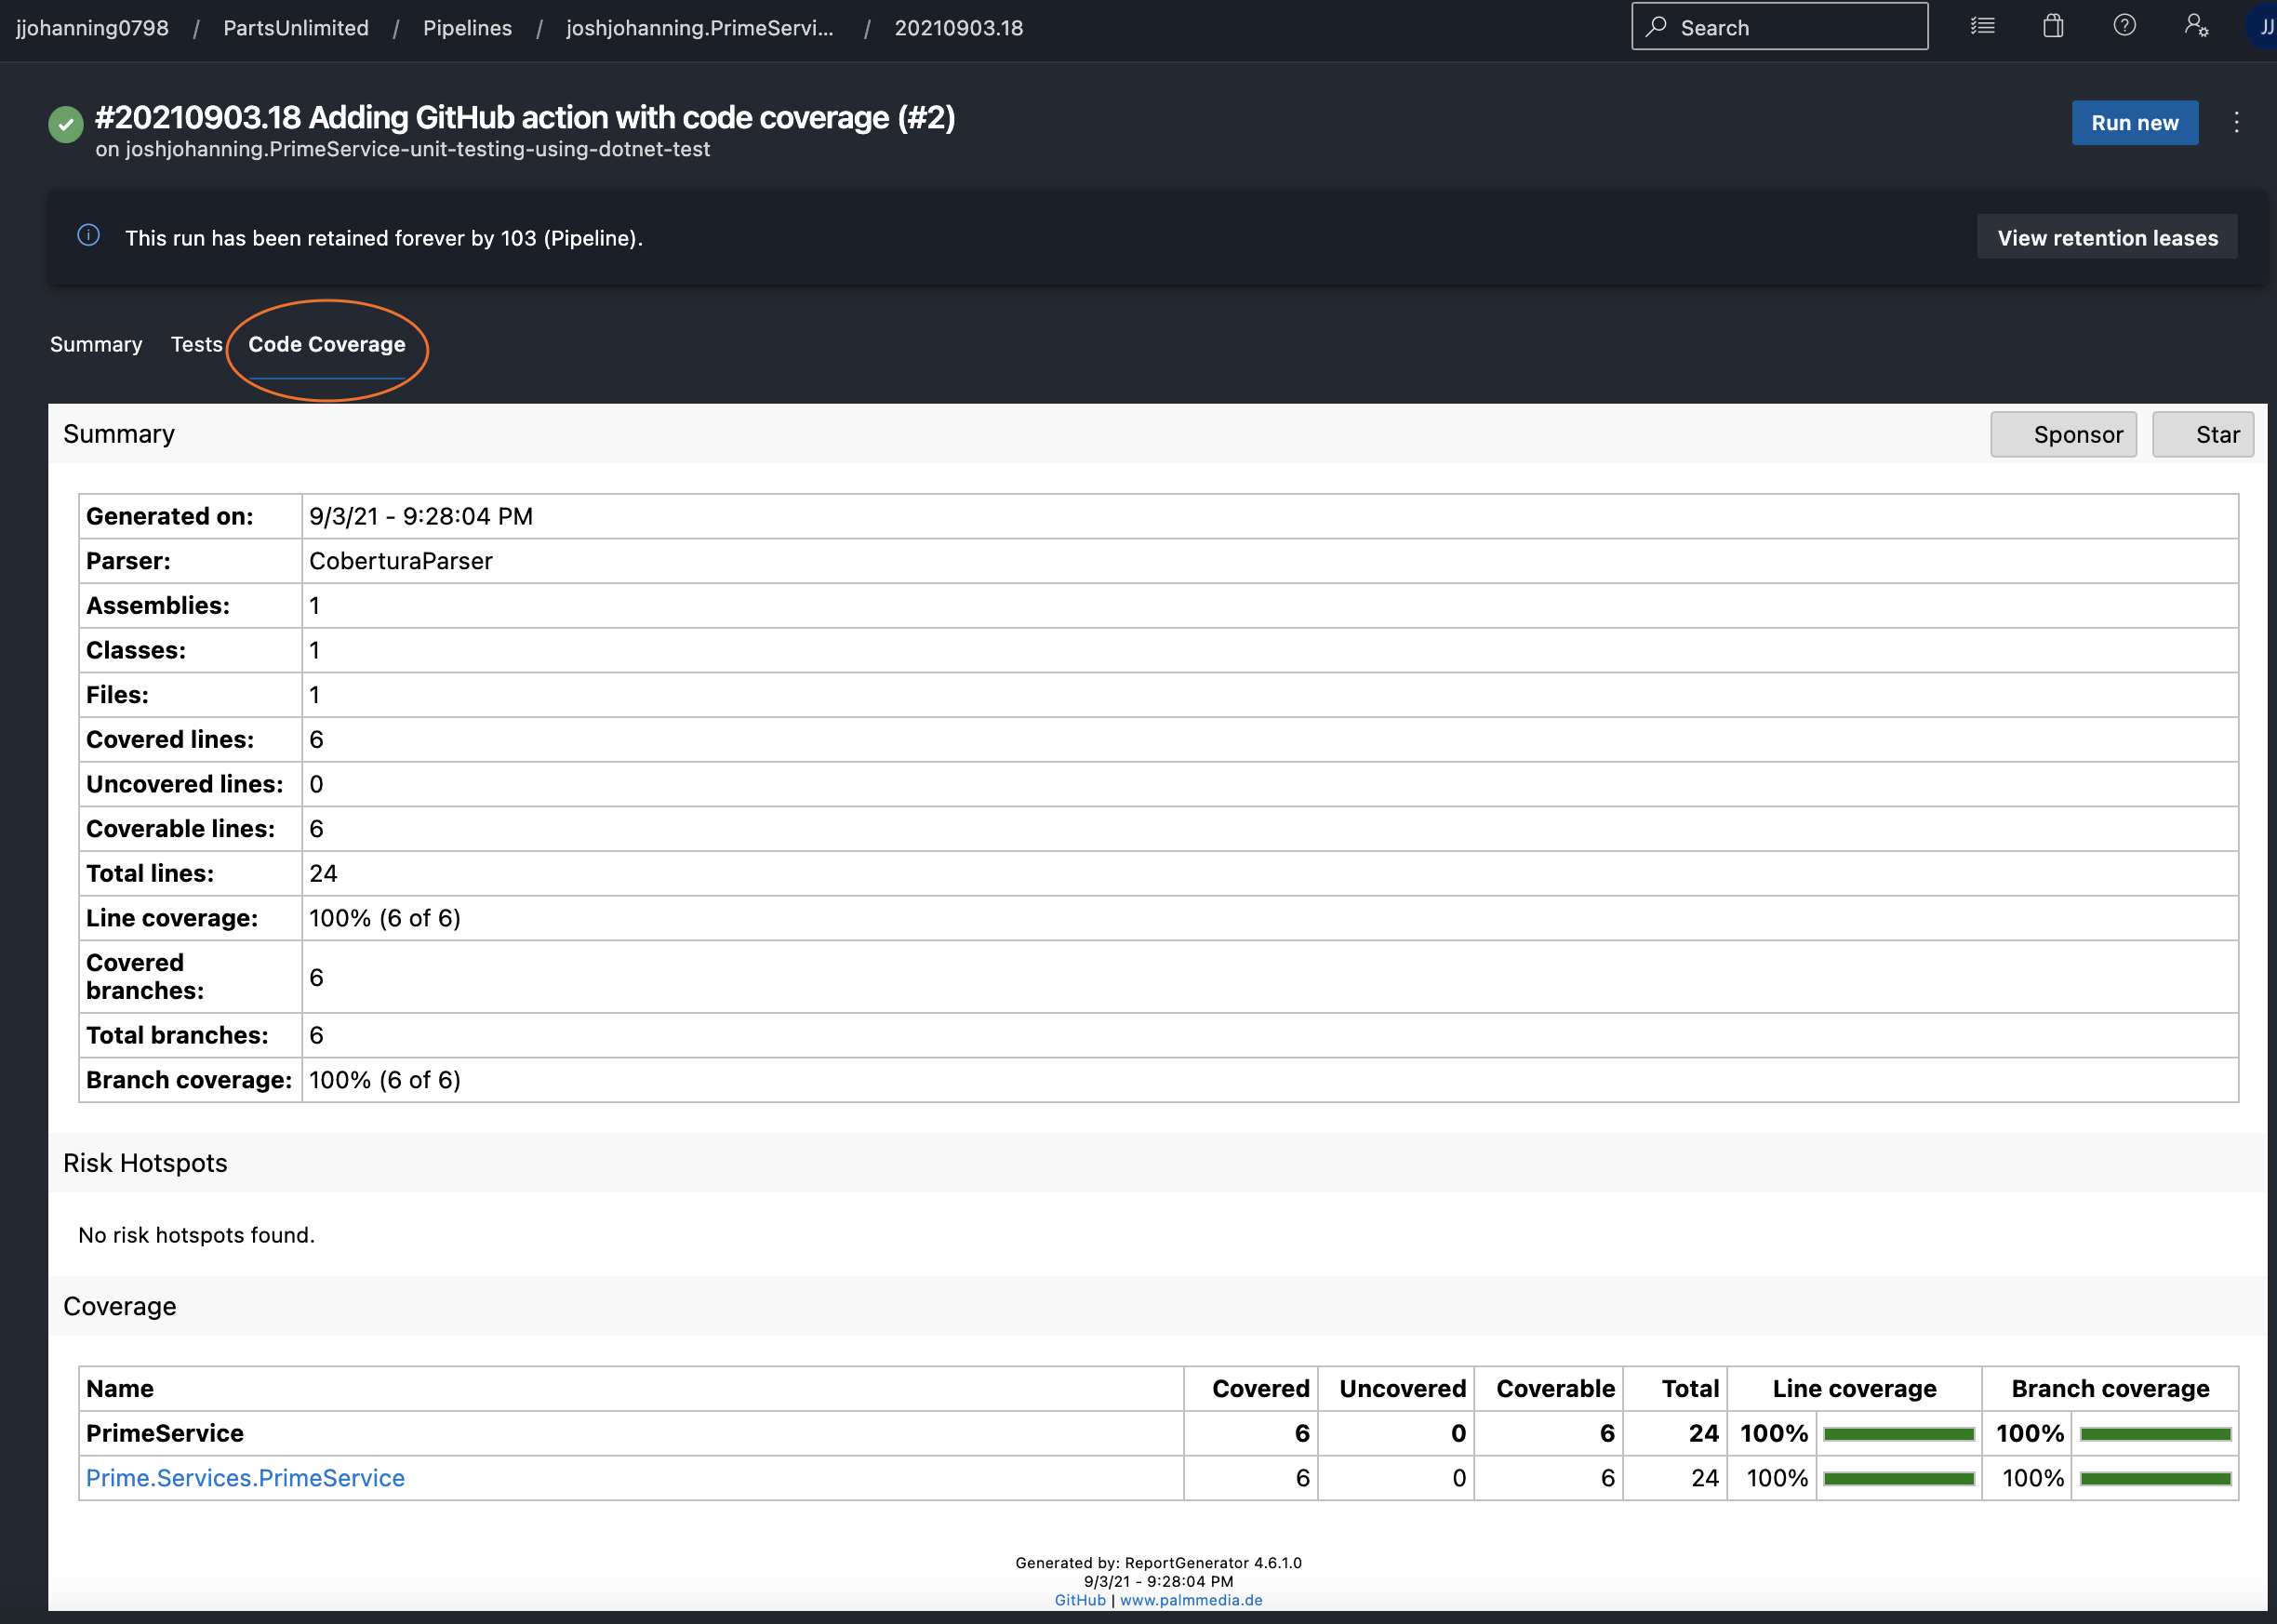
Now, after the entire pipeline has finished (including any of the deployment stages), we will have a code coverage tab with a way more visually appealing code coverage report: Cobertura Code Coverage Report in Azure DevOps
Why not ReportGenerator?
I’ve seen many blog posts that are similar to mine, except that they have the reportgenerator@4 task. I used to think this was required, too! But I have recently found out it is not – at least not if you have ONE test project you are publishing results for.
If you have multiple test projects you would like code coverage published for, then yes, the reportgenerator@4 task is needed.
I have started to use the command line instead of the actual reportgenerator@4 task itself, though, as not every organization has the marketplace extension installed (and some have stricter policies about adding extensions than others).
|
1 2 3 4 5 |
# First install the tool on the machine, then run it - script: | dotnet tool install -g dotnet-reportgenerator-globaltool reportgenerator -reports:$(Agent.WorkFolder)/**/coverage.cobertura.xml -targetdir:$(Build.SourcesDirectory)/CodeCoverage -reporttypes:'HtmlInline_AzurePipelines;Cobertura' displayName: Create code coverage report |
reportgenerator@4 equivalent:
|
1 2 3 4 5 |
# ReportGenerator extension to combine code coverage outputs into one - task: reportgenerator@4 inputs: reports: '$(Agent.WorkFolder)/**/coverage.cobertura.xml' targetdir: '$(Build.SourcesDirectory)/CoverageResults' |
This needs to run before the PublishCodeCoverageResults@1 task, and that task needs to be updated just a little bit (the xml file path is different). See:
|
1 2 3 4 5 6 7 |
# Publish the combined code coverage to the pipeline - task: PublishCodeCoverageResults@1 displayName: 'Publish code coverage report' inputs: codeCoverageTool: 'Cobertura' summaryFileLocation: '$(Build.SourcesDirectory)/CoverageResults/Cobertura.xml' reportDirectory: '$(Build.SourcesDirectory)/CoverageResults' |
Code Coverage Tab Not Showing Up?
This doesn’t really solve the problem where Azure DevOps will not show the Code Coverage tab until the entire pipeline (including all deployments) has completed. In cases where code coverage is important, I either:
- Change the report output from
$(Build.SourcesDirectory)to$(Build.ArtifactStagingDirectory)and publish the report as a pipeline artifact. - Create a separate build pipeline than deployment pipeline. This harkens back to the day where we didn’t have multi-stage YAML builds and we had separate Build Definitions and Release Definitions. We can set up the deployment yml pipeline to be triggered from the completion of the build yml pipeline.
Conclusion
Now you know the ins and outs of adding Code Coverage to your .NET (Core) projects in Azure DevOps.
Good luck!