Monthly Cumulative Updates released for Windows 10 bump the build number which means your Windows 10 ISO becomes outdated after a Cumulative Update gets released. You can integrate the Cumulative Update and other required updates, and build an updated ISO containing the latest version and build of Windows.
The process of integrating Windows update packages into the Windows Setup disk is known as Slipstreaming.
In some cases, system files corruption can be repaired by running the System File Checker and if necessary, the DISM command. If the Windows Component Store is corrupted, you’ll need to run DISM mentioning the source WIM file. That’s another reason to have an updated Windows 10 setup source always ready.
Slipstreaming is also useful if you want to freshly install the latest build of windows in other computers. The benefit is that that you don’t have to install an older version or build first, and then install the required updates via Windows Update manually (which may require multiple reboots, and prove to be counterproductive).
How to Slipstream Updates into your Windows 10 Setup Media
Let’s see how to slipstream Windows update packages to create an updated Windows 10 install media or ISO. Technical support folks do this every now and then after a Cumulative Update or a Service Pack or Roll-up package is released.
-
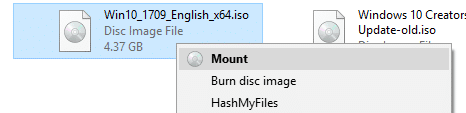
- Download the latest Windows 10 ISO from Microsoft website. As of this post, the latest Windows 10 Fall Creators Update version 1709 Build 16299.15 is the latest release.
- Right-click on the ISO and click Mount, to mount the ISO to a drive-letter.
-
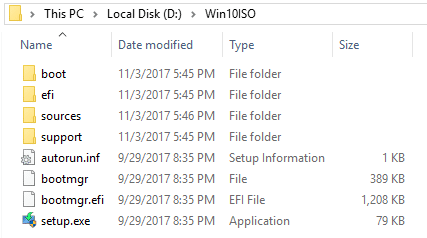
- Copy the contents of the ISO to a folder. Let’s say,
D:\Win10ISO
- Copy the contents of the ISO to a folder. Let’s say,
Skip steps 1-3 if you already have a bootable Windows (v1709) Setup USB flash drive. You can use that instead of the ISO.
-
- Next, get the Windows Update .msu or .cab packages by visiting the Microsoft Update Catalog. In the Microsoft Updates Catalog, use “windows 10 version 1709 x64” (since I’m using Windows 10 64-bit) or similar phrase to find updates available for the Fall Creators Update v1709 64-bit Windows version. If you’re using 32-bit Windows, then use x86 keyword instead of x64.

We have three updates available: KB4043961 which is the Cumulative Update (Build 16299.19), KB4051613 which is the Adobe Update, and KB4049179 which is a Security Update for Adobe.
- windows10.0-kb4043961-x64_5fb7d7bf32e79ea9debe8fb51af2a0c2e296e935.msu
- windows10.0-kb4049179-x64_47eff21486eab4ef646976186735a532f9b4a93f.msu
- windows10.0-kb4051613-x64_b2b1d0c13c89c6da1505178557b2150588a0358e.msu
- Download all the three updates to a folder. Let’s say the folder is
D:\v1709 Updates

- Download DISM GUI tool from CodePlex, and run the program elevated (Run as Administrator).
- Create a folder where you’re going to mount the install.wim file. Let’s say,
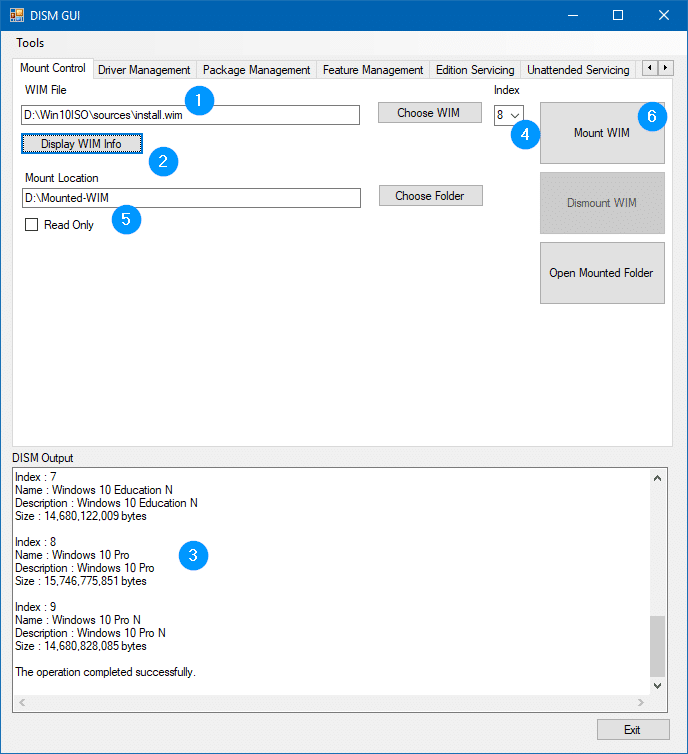
D:\Mounted-WIM - In the DISM GUI tool, mention the path to install.wim. In this example, the path would be
D:\Win10ISO\sources\install.wim
Note: In the sources folder, if the file install.esd exists instead of install.wim, first you’ll need to convert the ESD file to WIM format in order to service the image. Full instructions on that is available in article How to Convert ESD to WIM Using DISM in Windows 10
- Click the Display WIM Info button to view the indexes in the WIM file. In this example, we’ll choose Index: 8 (Windows 10 Pro, in this case) and service the image.
- Select 8 in the Index drop-down box
- In the Mount location, type in D:\Mounted-WIM
- Click the Mount WIM button
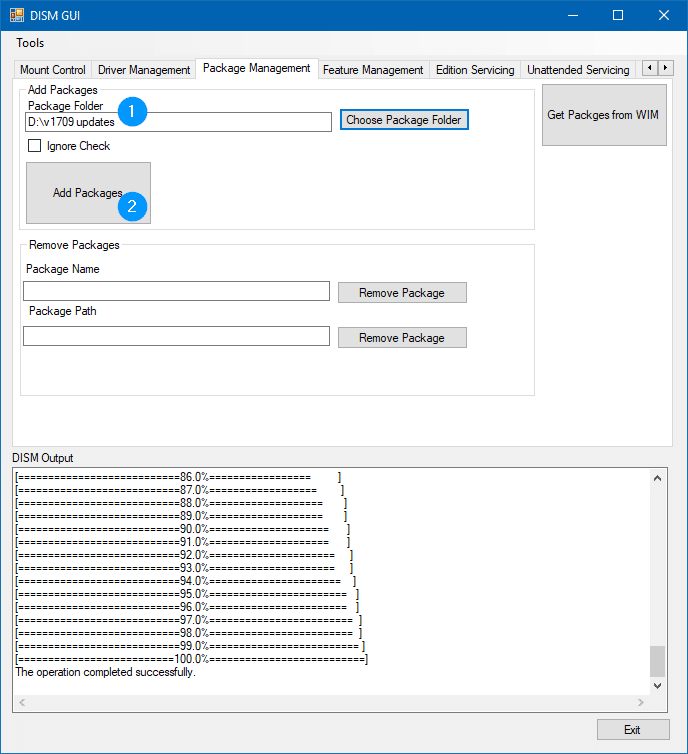
- Now that the WIM is mounted on to the specified folder. Click on the Package Management tab in DISM GUI.
- Type in or browse to locate the packages folder. In this example, the Windows Update packages are stored under D:\v1709 Updates
- Click on the Add Packages button.
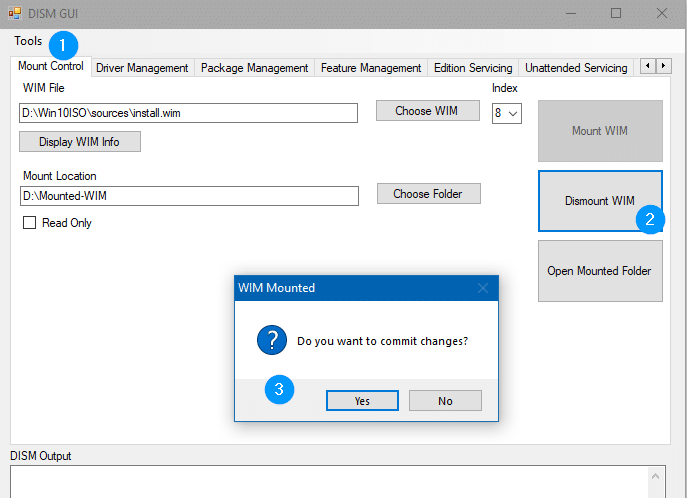
- Go back to the Mount Control tab, and click Dismount WIM.
- Click Yes when you’re asked to commit changes made to the WIM. Now, every available Windows Update package (*.msu and *.cab) in that folder will be integrated into the install.wim image.
- After step 9 is complete, delete the D:\Mounted-WIM and D:\v1709 Updates folders manually.
That’s it! You’ve now updated your Windows 10 setup source or USB installation media. You can run Setup.exe now if you plan to do a repair installation or in-place upgrade of Windows. Or, if you’re wanting to run DISM mentioning the setup source path to fix any corruption in the system, you can mention the path of the updated install.wim.
What does the DISM GUI tool do?
DISM GUI is an excellent front-end for the built-in DISM console tool. For this illustration, here is the list of commands the utility ran in the background.
Getting the WIM file Info and Viewing the Indexes
To get the WIM file info and its indexes, this is the command used:
|
1 |
dism.exe /Get-WimInfo /wimFile:"D:\Win10ISO\sources\install.wim" |
Mounting the WIM file
The Mount Vim button runs this tool to mount the install.wim image (index: 8) to the specified folder.
|
1 |
dism.exe /Mount-WIM /WimFile:"D:\Win10ISO\sources\install.wim" /index:8 /MountDir:"D:\Mounted-WIM" |
Adding Windows Update Packages to the mounted WIM file
The Add Packages button in DISM GUI runs this command:
|
1 |
dism.exe /image:"D:\Mounted-WIM" /Add-Package /PackagePath:"D:\v1709 updates" |
Dismount the WIM file and Commit Changes
To unmount the WIM file and to apply the changes (package addition or removal), this is the command used:
|
1 |
dism.exe /Unmount-wim /mountdir:"D:\Mounted-WIM" /commit |
Create an ISO file from the Updated Setup Source folder
Optionally, you can rebuild a new ISO from the contents of D:\Win10ISO folder. You can use ImgBurn or other tools for this task. More on that in another article. Also, take a look at NTLite tool which can integrate updates into your Windows setup media, as well as create an ISO in a jiffy.