 This is the complete guide on configuring WebRTC on ViciBox 8 and 9. Upon completing this guide you will have WebRTC and ViciPhone enabled on ViciDial.
The WebRTC configuration on ViciDial will consists of four main steps:
1 – setup SSL for the webserver (Apache)
2 – setup TLS in Asterisk built-in webserver
3 – Configure WebRTC and enable ViciPhone in ViciDial
4 – Use of PBXWebPhone as webrtc phone (optional)
Setup SSL for Apache
Configure the Certbot first:
Modify the file /etc/certbot/cli.ini. Here’s what you need to modify or verify:
1) Uncomment and make sure the ‘email =‘ section is set to your valid email. This is what ties the SSL certificates to you for management.
2) Uncomment and put the Fully Qualified Domain Name (FQDN) into the ‘domains =‘ section.
3) Uncomment the line ‘agree-tos = True‘
4) Uncomment the line ‘renew-by-default = True‘
5) Uncomment the ‘authenticator =’ line and change it from standalone to webroot, I.E. ‘authenticator = webroot‘
6) Uncomment the ‘webroot-path = /srv/www/htdocs‘ line
7) Comment out the staging ‘server =’ line and uncomment the production ‘server =‘ line.
After this, you need to make sure you can successfully generate an SSL certificate before continuing to modify Apache configs. If you modify Apache and cannot get an SSL cert issued then Apache will error and refuse to start. You can run Certbot by running ‘certbot certonly --webroot‘. In the output it should say that the SSL was successfully issued. Only once you have successfully gotten an SSL cert issued should you continue with the next set of instructions.
Once you have the SSL cert issued, you need to modify the file /etc/apache2/vhosts.d/1111-default-ssl.conf to reflect where the new SSL certs will be. Replace <FQDN> with the actual fully qualified domain name, I.E. www.vicibox.com, etc:
1) Change the SSLCertificateFile line to read: SSLCertificateFile /etc/certbot/live/<FQDN>/cert.pem
2) Uncomment and change the SSLCertificateChainFile line to read: SSLCertificateChainFile /etc/certbot/live/<FQDN>/fullchain.pem
3) Change the SSLCertificateKeyFile line to read: SSLCertificateKeyFile /etc/certbot/live/<FQDN>/privkey.pem
4) service apache2 restart
After that, you should be able to go to https://<FQDN> and successfully reach your ViciDial server.
Setup TLS for Asterisk
In the built-in webserver you now need to enable TLS port. Go to /etc/asterisk/http.conf:
|
1 2 3 4 5 6 7 8 9 |
[general] enabled=yes bindaddr=0.0.0.0 bindport=8088 enablestatic=yes tlsenable=yes tlsbindaddr=YOURIP:8089 tlscertfile=/etc/certbot/live/yourdomain.com/cert.pem tlsprivatekey=/etc/certbot/live/yourdomain.com/privkey.pem |
Make sure port 8089 is open in a firewall!
edit/add those lines to sip.conf :
|
1 2 3 4 5 6 7 8 9 10 11 12 13 14 15 16 17 18 |
[general] transport=udp,ws,wss avpf=yes srvlookup=yes udpbindaddr=0.0.0.0:5060 context=trunkinbound allowguest=no allowoverlap=no realm=YOURDOMAIN.com bindport=5060 bindaddr=0.0.0.0 srvlookup=yes disallow=all allow=ulaw allow=alaw mohinterpret=default mohsuggest=default language=en |
Configure WebRTC and enable ViciPhone in ViciDial
Now it’s time to enable WebRTC in ViciDial and enable ViciPhone in ViciDial.
Go to admin –> servers -> edit server then
Add to the “Web Socket URL” line:
|
1 |
wss://yourdomaine.com:8089/ws |
Then go to admin -> templates add a new template call it WebRTC Phone then add :
|
1 2 3 4 5 6 7 8 9 10 11 12 13 14 15 16 17 18 19 20 21 |
type=friend host=dynamic trustrpid=yes sendrpid=no qualify=yes qualifyfreq=600 transport=ws,wss,udp encryption=yes avpf=yes icesupport=yes rtcp_mux=yes directmedia=no disallow=all allow=ulaw,opus,vp8,h264 nat=yes directmedia=no dtlsenable=yes dtlsverify=no dtlscertfile=/etc/certbot/live/yourdomain.com/cert.pem dtlsprivatekey=/etc/certbot/live/yourdomain.com/privkey.pem dtlssetup=actpass |
go to admin –> phone then create a phone using the webrtc template ,
then go to “edit the phone” setting go to the line “set as webphone” to “Y”
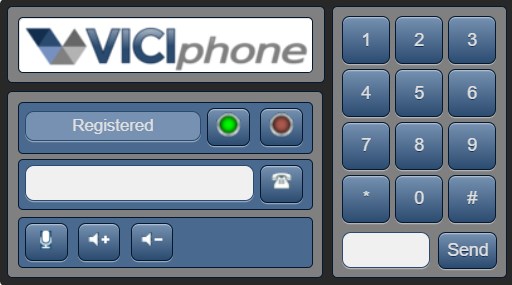
Now log in to the Agent interface and you should have your ViciPhone registered and able to receive a call:
 If you get Viciphone Reg. failed error make sure you restarted Asterisk to apply changes and that your Phone uses WebRTC template we have created earlier.
Use of PBXWebPhone as webrtc phone (optional)
Here is an example of Vicidial integration with custom WebRTC dialer
https://github.com/chornyitaras/PBXWebPhone
Git clone it into your web root folder:
|
1 2 |
cd /srv/www/htdocs/ git clone https://github.com/chornyitaras/PBXWebPhone.git |
Then in vicidial goto admin –> system settings then to the line :
Default webphone set it to “1”
Webphone url: PBXWebPhone/index.php
Now log in as the agent with the created phone and you should hear voice ” you are the only one in the world” 🙂
Good luck!